Product Page
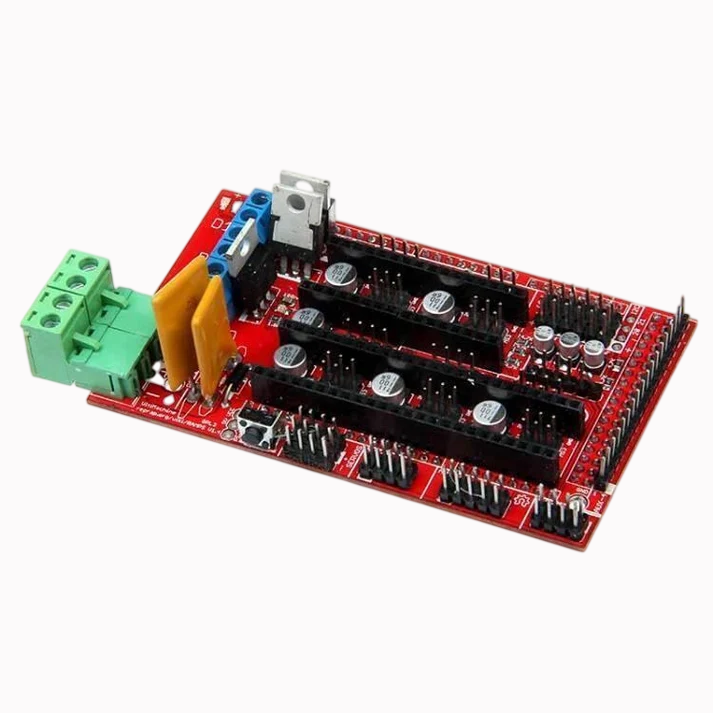
3d Printer Controller Board Ramps 1.4 Arduino in Pakistan
₨ 1,800
[yith_wcwl_add_to_wishlist]
Need some help?
Contact Us
Product Ships in
2-3-business Days
Payment Methods:

3d Printer Controller Board Ramps 1.4 Arduino Mega Shield Reprap Prusa Model
Product Introduction
Are you ready to build or upgrade your 3D printer with the most trusted controller in the RepRap community? The 3d Printer Controller Board Ramps 1.4 Arduino Mega Shield Reprap Prusa Model is the industry-standard solution for hobbyists and professionals in Pakistan. This powerful shield transforms your Arduino Mega 2560 into a fully-featured 3D printer control board. When you check the 3d Printer Controller Board Ramps 1.4 Arduino Mega Shield Reprap Prusa Model, you will find that microsolutuion.com.pk offers this essential component at a highly competitive price.
For the growing maker community in Pakistan, from the engineering universities of Lahore to the innovative workshops of Islamabad, getting reliable electronics is crucial. That is why we stock the 3d Printer Controller Board Ramps 1.4 Arduino Mega Shield Reprap Prusa Model. This board is the heart of thousands of printers worldwide, known for its stability, expandability, and incredible compatibility . Whether you are a student building your first Prusa i3, a professional upgrading a CNC machine, or a business setting up a print farm, this controller delivers the performance you need. We offer the 3d Printer Controller Board Ramps 1.4 Arduino Mega Shield Reprap Prusa Model at an affordable price, making quality 3D printing accessible to everyone in Pakistan.
Why choose this specific controller board for your project? Its modular design is the key. The 3d Printer Controller Board Ramps 1.4 Arduino Mega Shield Reprap Prusa Model uses plug-in stepper drivers like the A4988 or DRV8825 . This makes service, replacement, and upgrades incredibly simple . It supports all the essential functions: controlling five stepper motors, managing a heated bed, and reading temperature from thermistors . When you consider the 3d Printer Controller Board Ramps 1.4 Arduino Mega Shield Reprap Prusa Model, you invest in a versatile and reliable foundation for your machine.
Building a 3D printer has never been more straightforward. This shield lets you control the entire printing process smoothly. It is the perfect match for popular firmware like Marlin and Repetier . The 3d Printer Controller Board Ramps 1.4 Arduino Mega Shield Reprap Prusa Model also allows for expansion, connecting to LCD displays, SD card readers, and extra fans . Discover the best 3d Printer Controller Board Ramps 1.4 Arduino Mega Shield Reprap Prusa Model price in Pakistan at microsolutuion.com.pk.
We deliver this product across all of Pakistan, ensuring that you can access high-quality electronics wherever you are. When you buy the 3d Printer Controller Board Ramps 1.4 Arduino Mega Shield Reprap Prusa Model, you choose a component that powers a global community of makers. Get the best 3d Printer Controller Board Ramps 1.4 Arduino Mega Shield Reprap Prusa Model now and start turning your digital designs into reality. Our customers trust us for quality, performance, and the best prices.
2️⃣ Key Features
-
Simplify your build: Use the plug-and-play shield design for easy installation on your Arduino Mega.
-
Control five steppers: Manage your X, Y, Z (with two motors in parallel), and two extruders effortlessly .
-
Drive the heated bed: Connect and control a heated print bed using the dedicated 11A fuse .
-
Protect your investment: Rely on the 5A fuse for overall board and component safety .
-
Upgrade easily: Swap or replace the plug-in stepper driver boards without any soldering .
-
Read temperatures accurately: Connect thermistors for precise hot end and heated bed temperature monitoring .
-
Expand your system: Add an LCD display for standalone printing and an SD card module for offline use .
-
Connect endstops easily: Use the clear, labeled connectors for X, Y, and Z axis limit switches .
-
Power versatile outputs: Use the three MOSFET outputs for heater, fan, or other accessories .
-
See status at a glance: Monitor heater outputs with onboard LEDs that show when they are active .
-
Customize your machine: Use the I2C and SPI pins for future expansion and custom add-ons .
-
Achieve precision: Set micro-stepping to control your printer's resolution .
-
Keep it compact: Enjoy a single, small package that fits the entire electronics needed for your printer .
-
Save money: Get a cost-effective solution compared to many integrated controllers.
-
Use with confidence: Join thousands of makers worldwide who use this standard controller board.
-
Adjust motor current: Easily tune the current limit on your stepper drivers using the built-in trimpots .
-
Control fans: Use the PWM pins for controlling cooling fans .
-
Connect via USB: Use the standard USB Type-B receptacle for easy connection to your computer .
-
Automate leveling: Connect a servo for an auto bed-leveling probe .
-
Make it your own: Benefit from the massive open-source community and its support.
3️⃣ Advanced Features
-
Upgrade to 32-bit: Future-proof your setup with a 32-bit ARM controller board (like Re-Arm) that fits the same footprint .
-
Run Smoothieware: Experience advanced features by running the powerful Smoothieware firmware on the board .
-
Enable high micro-stepping: Use DRV8825 drivers for 1/32 micro-stepping, enabling smoother and quieter prints .
-
Automate G-code: Use the SD card slot for printing directly from an SD card without a PC .
-
Integrate with a laser: Use the board to control a laser engraver or CNC router .
-
Achieve fast print speeds: While the 8-bit Arduino has limits, proper tuning allows for impressive print speeds .
-
Implement auto-leveling: Connect a servo and probe for automatic bed leveling compensation.
-
Monitor with a GUI: Connect a graphical LCD display (like 12864) for a full-featured user interface .
-
Control a second extruder: Use the board's design to run a dual-extrusion printer for multi-material prints .
-
Customize with jumpers: Set micro-stepping easily by placing jumpers under the driver boards .
-
Run Marlin 2.0: Use the latest Marlin firmware with advanced features like "Linear Advance" for better print quality.
-
Use with CNC: Run GRBL firmware to transform the shield into a CNC machine controller .
-
Control high-power loads: Use the MOSFETs to switch high-power devices like powerful heated beds.
-
Implement thermal protection: The built-in fuses and thermal design provide some protection against over-current .
-
Operate fans smartly: Use firmware to control fans based on temperature thresholds.
-
Use with multiple power supplies: Power the logic and motors from separate supplies for more stable operation.
-
Configure for a Delta: Use it for a Delta 3D printer (though computation limits can be reached at high speeds) .
-
Add a power switch: Use the PS-ON pin to control an ATX power supply from the firmware .
-
Secure connectivity: Use the gold-plated servo-style connectors for a reliable, secure fit .
-
Future expansion: The board has plenty of room for adding more sensors and accessories.
4️⃣ Frequently Asked Questions
Q1: Where can I find the best 3d Printer Controller Board Ramps 1.4 Arduino Mega Shield Reprap Prusa Model price in Pakistan?
Answer: You can find the most competitive 3d Printer Controller Board Ramps 1.4 Arduino Mega Shield Reprap Prusa Model price directly on our website at microsolutuion.com.pk.
Q2: What is the RAMPS 1.4 board?
Answer: It is a shield for the Arduino Mega that serves as the electronics for a 3D printer, CNC, or laser engraver .
Q3: What do I need to use this board?
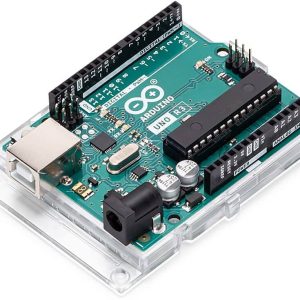
Answer: You need an Arduino Mega 2560, stepper motor drivers (like A4988), a power supply, and your printer's components .
Q4: Is this board compatible with the Prusa i3?
Answer: Yes, it is the standard controller for many RepRap-based printers, including the Prusa i3 and Mendel .
Q5: What firmware does it use?
Answer: It works with popular open-source firmware like Marlin, Repetier, and Sprinter .
Q6: Can I use this for a CNC machine?
Answer: Yes, it can run GRBL firmware and control CNC routers and laser engravers .
Q7: Does it support a heated bed?
Answer: Yes, it has a dedicated output and an 11A fuse specifically for controlling a heated bed .
Q8: Is the product available for delivery across Pakistan?
Answer: Yes, we offer fast and reliable delivery across all major cities in Pakistan.
Q9: Can I use it without a computer?
Answer: Yes, you can add an SD card module and an LCD display for standalone printing .
Q10: What is the 3d Printer Controller Board Ramps 1.4 Arduino Mega Shield Reprap Prusa Model price in microsolutuion.com.pk?
Answer: We offer this high-quality board at a very affordable and competitive price. Please check our website for the latest price.
5️⃣ Where It Can Be Used
-
3D Printing: Build a classic RepRap, Prusa i3, or Mendel 3D printer .
-
CNC Routing: Control a DIY CNC router for wood, plastic, or soft metals .
-
Laser Engraving: Power a laser engraver or cutter for etching designs .
-
Educational Projects: Teach robotics, automation, and electronics to students.
-
Print Farms: Standardize the control boards for a reliable multi-printer setup.
-
Wearable Tech: Used in advanced robotics projects requiring precise motor control.
-
Automation Systems: Control conveyor belts, pick-and-place machines, or other automated systems.
-
Hobbyist Upgrades: Upgrade an old 3D printer with a more reliable and standard controller.
-
Research and Development: Use the board as a platform for developing new motion control algorithms.
-
Small Business Prototyping: Build and test product prototypes using in-house 3D printers.
6️⃣ How to Use
Using the 3d Printer Controller Board Ramps 1.4 Arduino Mega Shield Reprap Prusa Model is a straightforward process, but it requires care and attention.
Step 1: Gather Your Materials.
You will need an Arduino Mega 2560, the RAMPS 1.4 shield, A4988 (or DRV8825) stepper drivers, a 12V power supply, and your printer's components (motors, endstops, heater, thermistor).
Step 2: Assemble the Hardware.
First, install the micro-stepping jumpers on the RAMPS 1.4 board. If using A4988 drivers, installing all three jumpers sets 1/16 micro-stepping . Now, carefully insert the stepper drivers into the X, Y, Z, and E0 sockets. Ensure the driver's orientation is correct; the potentiometer should face away from the power connectors for most A4988 drivers . The pins should slide into the sockets. Finally, mount the RAMPS 1.4 shield onto the Arduino Mega. Make sure all pins align perfectly with the sockets .
Step 3: Connect Your Printer.
Connect the stepper motor wires to the respective X, Y, Z, and E0 terminals . Next, connect the hot end heater to the D10 terminal, the heated bed to D8, and the fans to D9 . Plug the thermistors for the hot end and heated bed into the T0 and T1 sockets. Finally, connect the X, Y, and Z endstop switches to the "MIN" terminals .
Step 4: Configure the Firmware.
Download and install the Arduino IDE. You will need to install firmware like Marlin. In the firmware's configuration files, you must define your motherboard as BOARD_RAMPS_14 and set your other printer specifications (steps per mm, thermistor type, etc.). After configuration, upload the firmware to your Arduino Mega.
Step 5: Power Up and Test.
Connect your 12V power supply to the RAMPS board. Connect the printer to your computer via USB. You can now use a host software like Pronterface or OctoPrint to test each axis, heat the bed and hot end, and check endstop functionality . Always start with lower currents on your stepper drivers and adjust them using the trimpot.
Safety Tips
-
Power Off: Always disconnect power before connecting or disconnecting any component, especially stepper motors. Connecting/disconnecting motors while powered can damage the stepper drivers .
-
Correct Wiring: Double-check the polarity of your power connections. Reversing can destroy the board and cause a fire hazard .
-
Driver Orientation: Ensure your stepper drivers are inserted correctly. Incorrect insertion will destroy them .
-
Fuse Check: The board has a 5A and an 11A fuse. Check them if the board is not powering on correctly.
Maintenance Guidance
The RAMPS 1.4 board is robust but benefits from good maintenance. Regularly check all screw terminals to ensure connections are tight and secure. Keep the board free from dust and plastic debris, especially under the stepper drivers. If you are using a heated bed with high current, monitor the MOSFETs and power connections for heating, and consider upgrading them if necessary .
7️⃣ Advantages
-
Superior Performance: A stable, well-understood platform for reliable 3D printing.
-
Cost-Effective: An affordable solution for a complete control system .
-
Highly Reliable: A proven design used by thousands of printers worldwide.
-
Exceptionally Versatile: Suitable for 3D printers, CNCs, and laser engravers .
-
Immense Expandability: Add LCDs, SD cards, and more with expansion boards .
-
Easy to Upgrade: Modular design allows for swapping stepper drivers or upgrading to a 32-bit controller .
-
Global Community Support: Access to extensive documentation, firmware, and a large user community.
-
Simplifies Wiring: Clear labeling and standard connectors make assembly straightforward .
-
Durable Design: Built with quality components for long-lasting use.
-
Future-Proof: While based on 8-bit, the form factor allows for future upgrades without changing the wiring .
8️⃣ Disadvantages
-
Outdated 8-Bit: The Arduino Mega is an 8-bit controller, which can be a limitation for complex calculations, especially on Delta printers .
-
Lacks Integrated Drivers: You must purchase and install separate stepper drivers .
-
Potential Heat Issues: The MOSFET for the heated bed can run very hot; some users add an external MOSFET for high-current beds .
-
Complex Setup: Requires a good understanding of electronics and firmware to set up correctly.
-
PCB Design Flaws: Some cheaper clones have manufacturing flaws that can limit power output .
-
Large Footprint: It is larger than many newer, all-in-one controllers.
-
Limited Processing Power: Cannot handle the complex math required for high-speed, high-microstepping printing without stuttering.
-
Requires Careful Assembly: Incorrectly inserting drivers can easily destroy them .
-
Power Supply Management: Requires a separate high-amperage power supply for the heated bed.
-
Limited Memory: The Arduino Mega has limited RAM, making it difficult to implement complex features on older boards.
9️⃣ City-Wise Sales Coverage in Punjab
The 3d Printer Controller Board Ramps 1.4 Arduino Mega Shield Reprap Prusa Model is available for fast shipping across the whole of Punjab. We serve major tech cities including Lahore, Faisalabad, Rawalpindi, Multan, Gujranwala, Sialkot, Bahawalpur, Sargodha, Rahim Yar Khan, Sheikhupura, Jhang, Dera Ghazi Khan, Gujrat, Okara, Kasur, Sahiwal, Khanewal, Chiniot, Pakpattan, and Vehari. Order now, and we will deliver this essential component to your doorstep in just a few days.
RAMPS 1.4 3D Printer Controller Board | Best Price in Pakistan Get the best RAMPS 1.4 3D Printer Controller Board for your Arduino Mega in Pakistan. Ideal for Prusa, RepRap, CNC. Shop now at microsolutuion.com.pk!
-
RAMPS 1.4
-
3D Printer Controller Board
-
Arduino Mega Shield
-
RAMPS 1.4 Price in Pakistan
-
RepRap Controller
-
Prusa i3 Board
-
CNC Controller
-
Microsolutuion Pakistan
-
3D Printer Electronics
-
A4988 Driver Board
-
Marlin Firmware
-
Laser Engraver Controller
-
DIY 3D Printer Parts
-
3D Printer Motherboard
-
Buy RAMPS 1.4 in Lahore